How to Add Images and ALT Text in the Writing Studio
Add a picture to your book, choose its size and alignment, write the ALT text Amazon KDP asks for, and let the studio prepare it for print.
Quick Start
Adding a picture takes four steps. The studio prepares the picture for print by itself.
- Click the paperclip button in the Visual Editor toolbar, or paste a picture straight into your text.
- Choose the size and alignment.
- Write a short ALT text description of what the picture shows.
- Click Insert.
ALT text is required, because Amazon KDP now asks for it on every picture.

Full Guide
Step 1: Open the Insert Image window
You can add a picture in two ways. Both open the same Insert Image window.
- Click the paperclip button and choose the picture.
- Or paste a picture straight into your text.
You can use any PNG or JPG, at any size. There is no size-limit message, and a picture is never refused for being large.
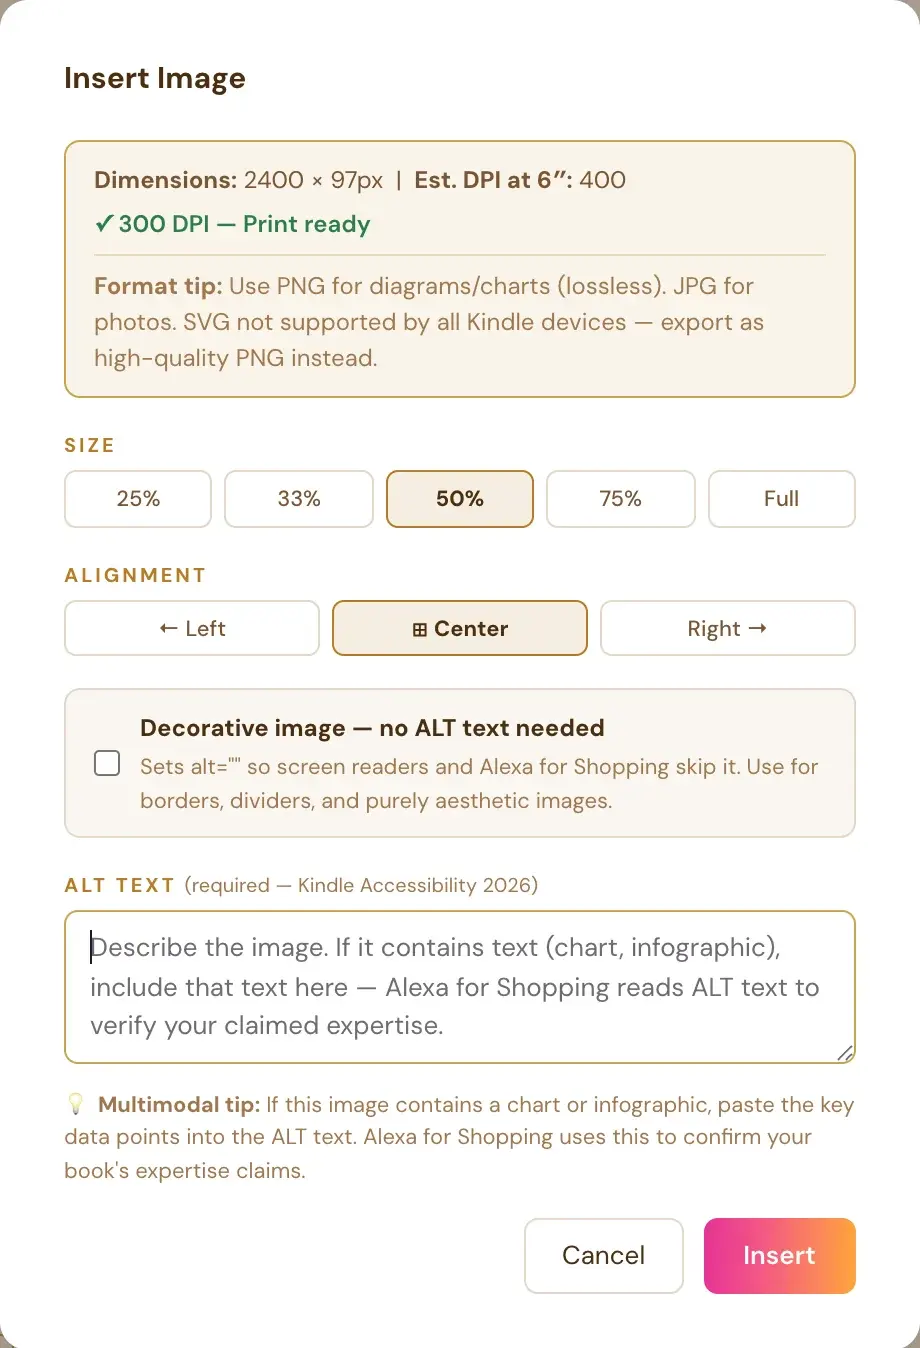
Step 2: Choose the size and alignment
- Size: 25%, 33%, 50%, 75% or Full.
- Alignment: Left, Center or Right.
Step 3: Write the ALT text
ALT text is a short description of the picture. It is read aloud to readers who cannot see the picture.
- Write one or two plain sentences about what the picture shows.
- If the picture contains text, a chart or an infographic, include that text or the key numbers in the ALT text.
This is required for KDP, so never skip it.
Step 4: Decorative images
If a picture is pure decoration, such as a divider, tick Decorative image instead. Use it only for pure decoration.
Step 5: Click Insert
The Insert button will not add the picture until there is a short description in the ALT text box, or the "Decorative image" box is ticked on purpose. If you try without one, a short popup explains why.
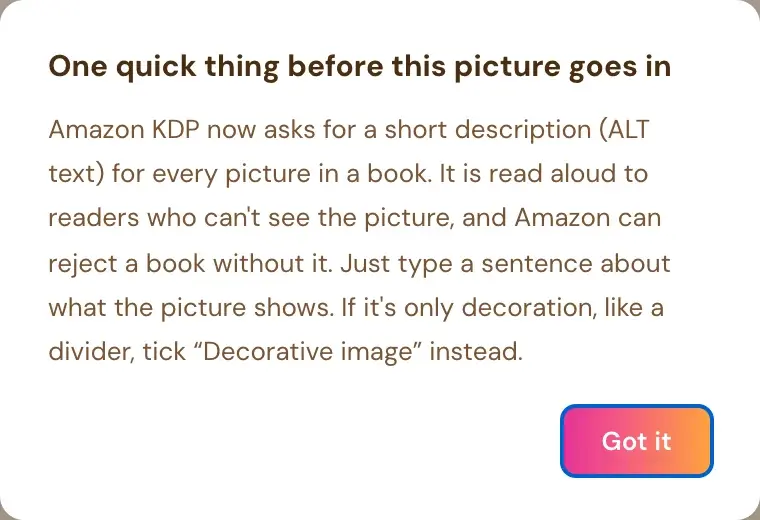
The popup says that Amazon KDP now asks for ALT text on every picture, that it is read aloud to readers who cannot see the picture, and that Amazon can reject a book without it.
Step 6: Let the studio prepare the picture
You do not need to compress, convert or upscale anything. The studio does it for you:
- A picture that is too small for print is enlarged automatically to print width, about 300 DPI at the page width.
- A huge picture is reduced to a size print never needs.
- Photos are saved as high-quality JPEG.
- Screenshots, diagrams and pictures with see-through areas stay PNG, so text and edges stay sharp.
- A picture is never refused for being large, and saving never fails because of size.
There is no separate Upscale step any more. Pictures already in the book that are print-sized need nothing re-done.
Step 7: Adjust the picture after you add it
Click the picture. A small bar appears under it with these options:
- Size buttons.
- Left, Center and Right alignment.
- Space above/below (Small, Medium or Large). This sets the gap above and below the picture in the print preview and PDF only.
- Link.
The Left, Center and Right buttons in the main toolbar also align a selected picture. You can also drag the gold handle on the picture's right edge to resize it. Size, alignment and spacing all carry into the print preview and the PDF.
Troubleshooting
The Insert button does nothing. Check that the ALT text box has a short description, or that Decorative image is ticked on purpose. The popup explains this when you click Insert.
My picture looks lighter in Page Preview. For speed, Page Preview uses lighter copies of your pictures, in the same size and position. Export PDF always uses the full-quality pictures.
Where to Go Next
Official rules for pictures and accessibility are in the KDP content quality guide and the KDP manuscript file guide. Not sure where to start? The Course Coach inside the app guides you through each step, so you are never stuck on a button.
Related Tutorials
Last checked in the app: October 14, 2026.
Still Need Help?
Inside the app, the Course Coach answers your questions and guides you step by step. You can also write to us and we will get back to you.
Contact Support