
How to Set Up Your Front Matter on the Front End Tab
Fill in your title page, impressum, table of contents and dedication, then fine-tune each page in the visual editor.
Quick Start
Your front matter is the set of pages at the start of your book: the title page, the impressum (the copyright page), the table of contents and the dedication. You set them all up in one place.
- Click the Front End tab at the top of the Writing Studio.
- Fill in the book front matter: title, subtitle, author name, publisher, ISBN, trademarks, disclaimer and dedication.
- On the right, click a page thumbnail to open that page in the visual editor.
- Drag, resize, bold or italicize any text block you want to adjust.
- Export your book. Everything you entered fills the title page and impressum automatically.
Everything auto-saves, so there is no separate save button to look for.
Full Guide
Step 1: Open the Front End tab
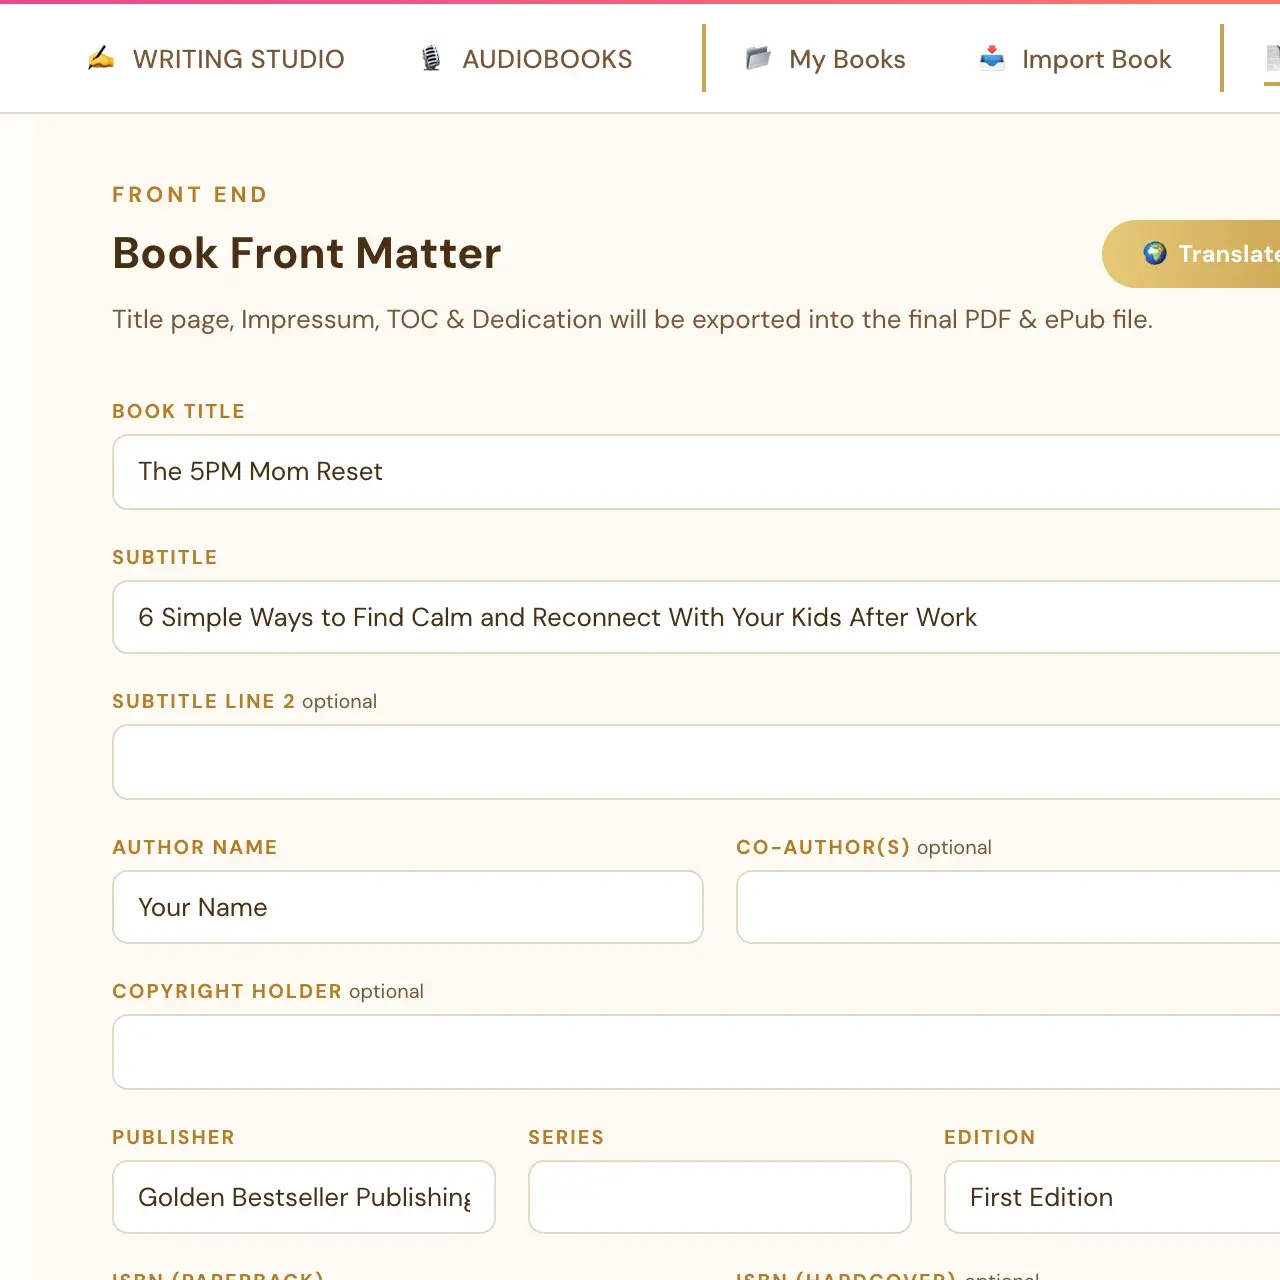
The top tab row of the Writing Studio holds all the main areas: Writing Studio, Audiobooks, My Books, Import Book, Front End, Final Editor, QR Library and Tutorials. The Front End tab holds your book front matter: title page, impressum, table of contents settings and dedication. All of it auto-populates into the exported PDF and ePub.

On a phone, this row swipes sideways. A small ‹ › arrow sits beside Audiobooks while more tabs are off-screen, so if you cannot find Front End, tap the arrow. On a phone the form comes first and the page thumbnails are below it.
Step 2: Fill in the core details
Start with your book title, subtitle and author name. The form also holds the publisher, ISBN, trademarks, disclaimer and dedication.
Take extra care with the book title and the author name. Once both are filled in, they print automatically at the top of the body pages inside your printed book, with the title on left-hand pages and your author name on right-hand pages. See How do running headers and page numbers work?
Step 3: Publisher, edition and series
Fill in the publisher, the edition and the series if they apply to your book. Translate (see Step 11) covers the edition and series as well.
Step 4: ISBN
Enter your ISBN. The Front End tab also holds a copyright holder, so you can fill that in if it is needed.
Step 5: Trademarks, cover credit and the Library of Congress line
- Trademarks: enter your trademark names. Import finds them even when they are mentioned inline in a sentence, not just in a clean list.
- Cover design credit: the page prints it with the label "Cover Design:", which is built into the page.
- The Library of Congress line: there is a checkbox for the "Cataloging-In-Publication Data... Library of Congress" line.
Step 6: Disclaimer and dedication
Type your disclaimer, then add your dedication. Dedication paragraph breaks are retained.
Step 7: Add your own impressum entries
If you need extra lines that have no field of their own, use Additional Fields. This is also where anything real that import finds but cannot fit into one of the standard fields lands.
Step 8: Look at the four page thumbnails
On the right, four page thumbnails show your real front pages: Title Page, Impressum, Table of Contents and Dedication. Clicking one opens a live, editable preview of that exact page. It is a pixel-accurate preview of the real exported PDF, not an approximation. The tab builds its thumbnails from a full-book preview the first time it opens, and does not rebuild them when you leave the tab and come back unless the book changed.
The page most people think of as the copyright page is labeled Impressum. It is the same page with the same content: copyright notice, rights statement, trademarks, ISBN and disclaimer. See Where is my copyright page?
Step 9: Edit a page in the visual editor
Click any thumbnail to open the page. Then edit the blocks.
- Click a text block to select it. A dashed outline with small round handles appears.
- Type directly into most blocks to edit the text right there.
- Drag the block itself to reposition it anywhere on the page.
- Drag a corner handle to make the text bigger or smaller. The block's width shrinks or grows with it.
- Drag a side handle (left or right edge) to change only the block's width, without changing the text size.
- Click B or I to bold or italicize the whole selected block, not just a word or two.
- Click Reset to put one changed block back to its default position, size and style.
Every change auto-saves. To get small text that still spans the full page width, drag a corner inward first, then drag a side handle back out. Blocks never have artificial narrow margins. The only limit on how wide a block can go is the real page margin, the same margin Amazon requires. For more detail, see How do I move, resize or bold the text blocks on my front pages?
Step 10: Check your table of contents
Open the Table of Contents thumbnail. The entries always mirror the real chapter titles from the Chapters panel, so you edit them by renaming the chapter, not by typing in the ToC canvas. The PDF table of contents has page numbers. In an ePub, the entries are navigation links. See How does the table of contents work?
Step 11: Translate your front matter
If your book is going into another language, click the golden 🌍 Translate button next to the "Book Front Matter" heading and pick a language: Spanish, German, French, Italian, Portuguese or Japanese. It translates your book title, subtitle, edition, series, dedication, disclaimer and any custom fields you added, all at once. Names such as the author, publisher, copyright holder, trademarks and cover designer credit always stay exactly as you typed them. See How do I translate my front matter?
Step 12: Back up and export
At the bottom of the Writing Studio you will see the autosave status and the Save to Your Cloud button, which makes a backup copy of the whole book in your own storage. When you are ready, click the Export button in the top-right corner. See How to Export Your Book.
Troubleshooting
I cannot find the copyright page. It is called Impressum. Click that thumbnail on the Front End tab.
I imported my book and my copyright page did not become a chapter. That is intentional. The title page, copyright and legal-notice content is not imported as a chapter. Import reads that content and prefills what it can in the Front End tab. Check it over, and fix anything the automatic read missed. See What happens to my copyright page and images when I import?
My text moved when I resized it. Click the block, then click Reset to put that block back to its default position, size and style.
I want to change the table of contents wording. Rename the chapter in the chapter list. The ToC follows.
Where to Go Next
Next, see how your pages look in print in How to Use Page Preview and Templates. Not sure where to start? The Course Coach inside the app guides you through each step, so you are never stuck on a button.
Related Tutorials
Last checked in the app: October 14, 2026.
Still Need Help?
Inside the app, the Course Coach answers your questions and guides you step by step. You can also write to us and we will get back to you.
Contact Support