
How to Get Your Manuscript Into the Writing Studio: Four Ways, Step by Step
Start a blank book, pull your outline from the Chapter Detail Generator, paste an outline, or import a Word or ePub book.
There are four ways to get your manuscript into the Writing Studio. Pick the one that matches where your book is today.
Which Way Should I Get My Manuscript In?
- You ran the Chapter Detail Generator: pull your outline in, or paste it.
- You're starting from nothing: create a new book and add chapters yourself.
- You already wrote your book in Word or as an ePub: import it. See How to Import Your Book.
- You translated your book in Step 8: the translation comes back as its own book in My Books.
Step 1: Create a New Book
Want to start a fresh book? Open the My Books tab, click + Create New Book, and fill in the naming window. Your new book opens, ready for you to write.

How Do I Create a New Book?
- Click the My Books tab at the top of the Writing Studio.
- Click + Create New Book.
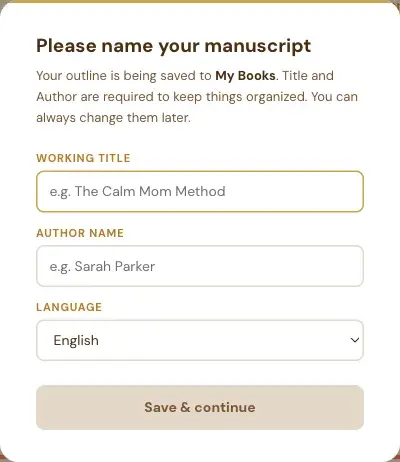
- In the window Please name your manuscript, fill in your Working title, your Author name and your Language.
- Click Save & continue.
Why Does It Ask for a Title and an Author?
The window says it plainly: "Title and Author are required to keep things organized. You can always change them later." So a working title is fine. It doesn't have to be final.
Can I Close the Naming Window Without Filling It In?
No. This window is on purpose: it has no Cancel button, and Escape doesn't close it. Fill in a working title and your name, and you can change both later.
What Happens After I Save?
Your new book opens in the Writing Studio, with no chapters yet. You then choose how to fill it. See How to Start a Blank Book and Add Chapters.
What If I Haven't Connected Storage Yet?
The first time you create or import a book, the app asks you to choose where to keep a backup copy: Google Drive, Dropbox, OneDrive or your own computer. See How to Connect Cloud Storage.
Step 2: Start From a Blank Book
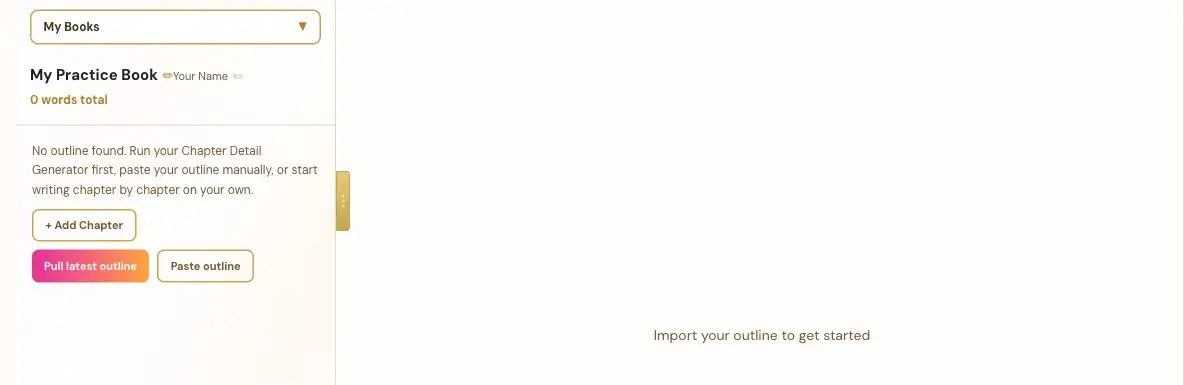
A brand-new book starts empty, and the Writing Studio shows you three ways to fill it: + Add Chapter, Pull latest outline and Paste outline.
What Does a New Blank Book Look Like?
Your title and author name sit at the top, and the word count says 0. Below, a message says: "No outline found. Run your Chapter Detail Generator first, paste your outline manually, or start writing chapter by chapter on your own." On the right, the page says "Import your outline to get started."
What Are the Three Ways to Start?
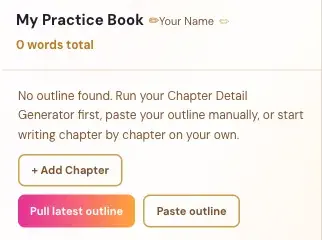
- + Add Chapter: start writing chapter by chapter on your own.
- Pull latest outline: bring in your outline from the Chapter Detail Generator. See How to Pull Your Outline Into the Writing Studio.
- Paste outline: paste the output of the Chapter Detail Generator. See How to Paste Your Outline.
Which One Should I Choose?
If you ran the Chapter Detail Generator in Step 3 · BUILD, use Pull latest outline. Your chapters, goals and writing prompts come in for you. If you plan as you go, use + Add Chapter.
Step 3: Pull Your Outline From the Chapter Detail Generator
Ran the Chapter Detail Generator in Step 3 · BUILD? Click Pull latest outline in your blank book, and your chapters and sections come straight in. No copying and pasting.
How Do I Pull My Outline Into the Writing Studio?
- Open a book with no outline yet. See How to Start a Blank Book.
- Click Pull latest outline.
- Wait a moment. Your outline fills in.
What Do I Get?
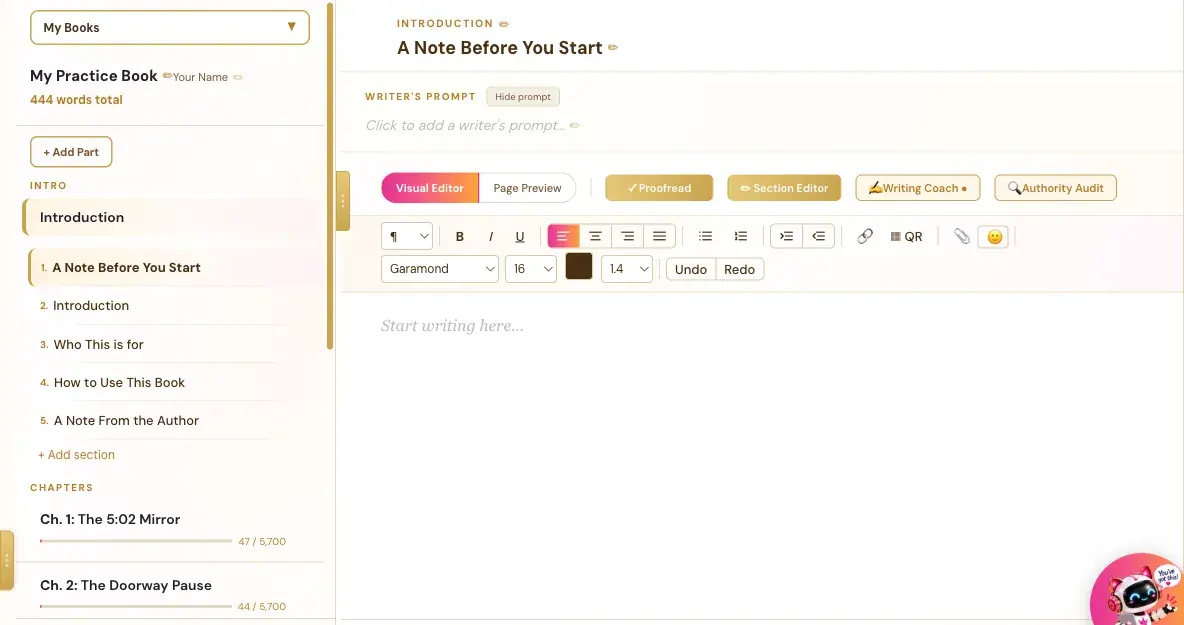
- Your intro sections: A Note Before You Start, Introduction, Who This Is For, How to Use This Book and A Note From the Author.
- Your chapters, each with its title and a word target, like "47 / 5,700."
- Your Writer's Prompts and goals for each section, from the Chapter Detail Generator.
Which Outline Does It Pull?
Your most recent Chapter Detail Generator result. In My Books, the + Pull Latest Outline button opens a list headed Pull from project, so you can pick which project's outline to use. See How to Work on More Than One Book.
What If I See "No Chapter Detail Output Found"?
You haven't run the Chapter Detail Generator yet. Run it first. See Chapter Detail Generator. Or paste an outline in instead: How to Paste Your Outline.
What If My Book Has No Title Yet?
A window asks you to name your manuscript first. See How to Create a New Book.
Step 4: Paste Your Outline
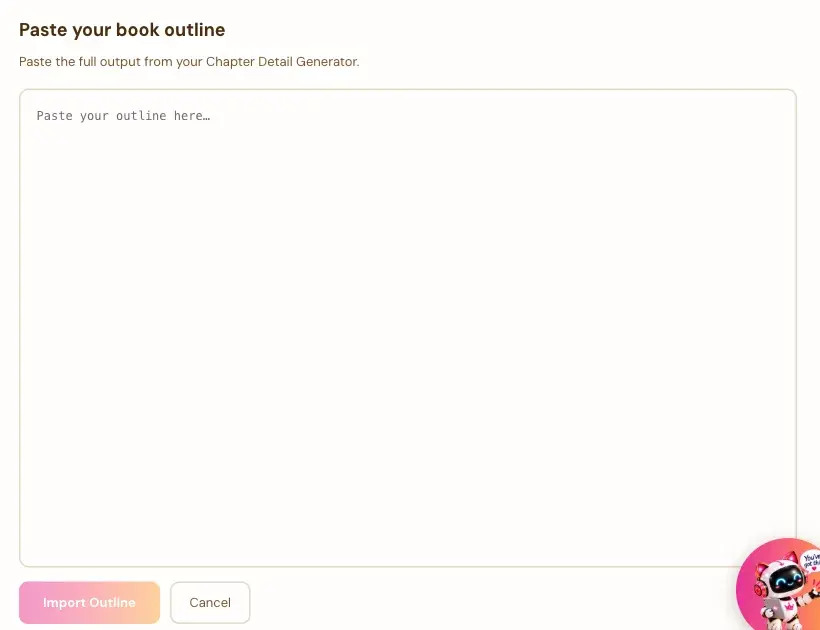
Prefer to copy and paste? Click Paste outline, paste the full output from your Chapter Detail Generator into the box, and click Import Outline.
How Do I Paste My Outline?
- In a blank book, click Paste outline.
- Paste your outline into the box. It says: "Paste the full output from your Chapter Detail Generator."
- Click Import Outline. Or click Cancel to go back.
What Should I Paste?
The whole result from your Chapter Detail Generator, with its CHAPTER headings. Copy it from the generator with the Copy button.
What If It Can't Find My Chapters?
You'll see a message: "Could not find any chapters. Paste the full output from your Chapter Detail Generator. It should include CHAPTER headings." Go back to the generator, copy the whole result again, and paste it in.
Is It Different From Pull Latest Outline?
Same result, a different route. Pull brings it in for you. Paste lets you bring in a result you copied. See How to Pull Your Outline Into the Writing Studio.
What Comes Next?
Start writing with How to Write Your First Section. Importing a finished book? See How to Import Your Book Into the Writing Studio. Not sure where to start? The Course Coach inside the app guides you through every step, so you're never stuck on a button. Back to Step 4 · WRITE.
Related Tutorials
Last checked in the app: October 14, 2026.
Still Need Help?
Inside the app, the Course Coach answers your questions and guides you step by step. You can also write to us and we will get back to you.
Contact Support