How to Set Up Your Book in the Writing Studio: Chapters, Outline, Prompts and Word Targets
Create a new book, bring in your outline, add chapters and sections, and learn how the Writer's Prompt, word targets and autosave work.
Your Writing Studio is where your book comes to life, and it starts with a good setup. This tutorial walks you through creating your book, bringing in your outline, adding chapters, and understanding the Writer's Prompt, your word targets and autosave.
Step 1: Create Your Book
Want to start a fresh book? Open the My Books tab, click + Create New Book, and fill in the naming window. Your new book opens, ready for you to write.
How Do I Create a New Book?
- Click the My Books tab at the top of the Writing Studio.
- Click + Create New Book.
- In the window Please name your manuscript, fill in your Working title, your Author name and your Language.
- Click Save & continue.
Why Does It Ask for a Title and an Author?
The window says it plainly: "Title and Author are required to keep things organized. You can always change them later." So a working title is fine. It doesn't have to be final.
Can I Close the Naming Window Without Filling It In?
No. This window is on purpose: it has no Cancel button, and Escape doesn't close it. Fill in a working title and your name, and you can change both later.
What Happens After I Save?
Your new book opens in the Writing Studio, with no chapters yet. You then choose how to fill it. See How to Start a Blank Book and Add Chapters.
What If I Haven't Connected Storage Yet?
The first time you create or import a book, the app asks you to choose where to keep a backup copy: Google Drive, Dropbox, OneDrive or your own computer. See How to Connect Cloud Storage.
Step 2: Fill Your Blank Book
A brand-new book starts empty, and the Writing Studio shows you three ways to fill it: + Add Chapter, Pull latest outline and Paste outline.
What Does a New Blank Book Look Like?
Your title and author name sit at the top, and the word count says 0. Below, a message says: "No outline found. Run your Chapter Detail Generator first, paste your outline manually, or start writing chapter by chapter on your own." On the right, the page says "Import your outline to get started."
What Are the Three Ways to Start?
- + Add Chapter: start writing chapter by chapter on your own.
- Pull latest outline: bring in your outline from the Chapter Detail Generator. See How to Pull Your Outline Into the Writing Studio.
- Paste outline: paste the output of the Chapter Detail Generator. See How to Paste Your Outline.
Which One Should I Choose?
If you ran the Chapter Detail Generator in Step 3 · BUILD, use Pull latest outline. Your chapters, goals and writing prompts come in for you. If you plan as you go, use + Add Chapter.
Step 3: Pull In Your Outline
Ran the Chapter Detail Generator in Step 3 · BUILD? Click Pull latest outline in your blank book, and your chapters and sections come straight in. No copying and pasting.
How Do I Pull My Outline Into the Writing Studio?
- Open a book with no outline yet. See How to Start a Blank Book.
- Click Pull latest outline.
- Wait a moment. Your outline fills in.
What Do I Get?
- Your intro sections: A Note Before You Start, Introduction, Who This Is For, How to Use This Book and A Note From the Author.
- Your chapters, each with its title and a word target, like "47 / 5,700."
- Your Writer's Prompts and goals for each section, from the Chapter Detail Generator.
Which Outline Does It Pull?
Your most recent Chapter Detail Generator result. In My Books, the + Pull Latest Outline button opens a list headed Pull from project, so you can pick which project's outline to use. See How to Work on More Than One Book.
What If I See "No Chapter Detail Output Found"?
You haven't run the Chapter Detail Generator yet. Run it first. See Chapter Detail Generator. Or paste an outline in instead: How to Paste Your Outline.
What If My Book Has No Title Yet?
A window asks you to name your manuscript first. See How to Create a New Book.
Step 4: Or Paste Your Outline
Prefer to copy and paste? Click Paste outline, paste the full output from your Chapter Detail Generator into the box, and click Import Outline.
How Do I Paste My Outline?
- In a blank book, click Paste outline.
- Paste your outline into the box. It says: "Paste the full output from your Chapter Detail Generator."
- Click Import Outline. Or click Cancel to go back.
What Should I Paste?
The whole result from your Chapter Detail Generator, with its CHAPTER headings. Copy it from the generator with the Copy button.
What If It Can't Find My Chapters?
You'll see a message: "Could not find any chapters. Paste the full output from your Chapter Detail Generator. It should include CHAPTER headings." Go back to the generator, copy the whole result again, and paste it in.
Is It Different From Pull Latest Outline?
Same result, a different route. Pull brings it in for you. Paste lets you bring in a result you copied. See How to Pull Your Outline Into the Writing Studio.
Step 5: Add Chapters and Sections
Want another chapter? Click + Add Chapter at the bottom of the chapter list on the left. Want another section inside a chapter? Open the chapter and click + Add section.
How Does the Chapter List Work?
The chapters panel on the left lists all your chapters and their sections, in order.
- Click a chapter title to open it and see its sections.
- Click any section name to jump straight to that section in the editor.
- Click the thin strip on the right edge of the list to collapse it. Click it again to bring it back.
- At the top of the list, a dropdown shows your current book's name, and a + button creates a new manuscript.
How Do I Add a Chapter?
- Open the Writing Studio tab.
- Scroll to the bottom of the chapter list on the left.
- Click + Add Chapter.
How Do I Add a Section?
- Click a chapter title to open it and see its sections.
- Click + Add section inside that chapter.
That's the only way to add a section to a chapter.
How Do I Move or Delete a Chapter or Section?
- On a computer: drag a section to reorder it inside its chapter.
- On a phone or tablet: every chapter and section has ▲ ▼ buttons to move it up or down, and a visible × to delete it. Deleting asks you to confirm first. Drag and drop doesn't work on a touch screen.
Can I Rename a Chapter Heading?
Yes. The small "Chapter N · Title" heading above each chapter's content is editable. Click it and type whatever you want. It stays exactly as you typed it, and it no longer switches back to the automatic "Chapter N" form.
Why Is My Introduction One Chapter With Several Sections?
In a new book, the front-of-book pieces ("A Note Before You Start," "Introduction," "Who This Is For," "How to Use This Book," "A Note From the Author" and so on) are combined into one real Introduction chapter, with each piece as a section under it. A book made before this change still shows those pieces as separate chapters. That's correct for that book, because we don't change the shape of existing manuscripts.
Where Do My Author Bio and Extra Pages Go?
Your author bio, lead magnet and social links for the back of the book are written like any other chapter. They're one of the last chapters in your normal chapter list, for example a "Final Chapter" or "More From the Author" entry. Back Matter is the last entry in the same scrollable list. Click it to open or close it, just like a chapter. Your Bibliography, built from the Authority Audit's citations, lives inside Back Matter too.
There's no separate Back End or Interior Bio tab anymore. Wondering where it went? It's now part of your regular chapter list, at the end of the book.
Step 6: Use Your Writer's Prompt
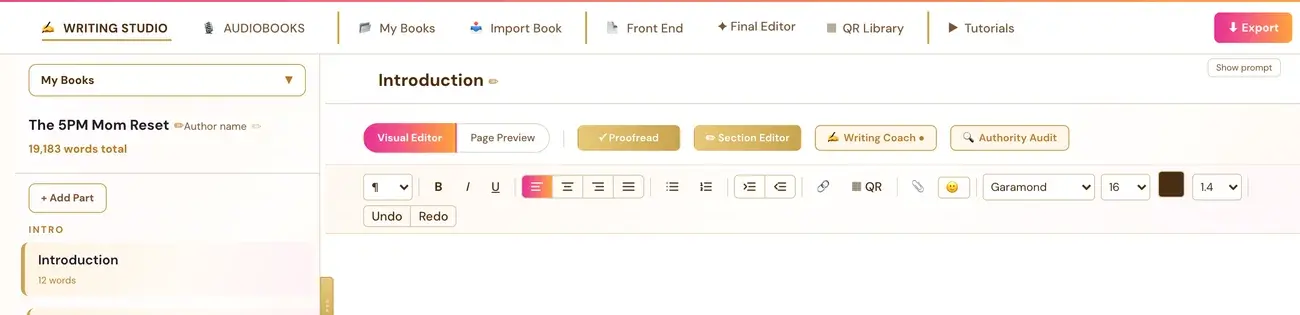
The Hide prompt and Show prompt button turns the Writer's Prompt panel off and on. Click Show prompt in the top right of the editor area to bring it back. The Writing Studio remembers your choice for each book.
What Is the Writer's Prompt?
The Writer's Prompt is the writing guidance for one specific section, from the Chapter Detail Generator (Step 3 · BUILD). On your Step 4 · WRITE Roadmap page, it's called "Writing Prompt: Guidance inside each section."
The Goal line comes with it. It's shown in italics after "The Goal:" and says what that section is meant to do.
How Do I Hide the Writer's Prompt?
- Open the Writing Studio tab and click a section.
- Click Hide prompt.
On a phone, Hide prompt removes the Writer's Prompt panel when you want more room.
How Do I Bring the Writer's Prompt Back?
Click Show prompt in the top right of the editor area.
Will the Writing Studio Remember My Choice?
Yes. Hiding the prompt is remembered for each book. Once you hide it, it stays hidden for that book every time you come back, until you click Show prompt yourself. That's expected, not a bug.
Why Can't I See a Prompt at All?
If there's no prompt, you haven't run the Chapter Detail Generator for that section yet. Go to the generators and run the Chapter Detail Generator first. See Chapter Detail Generator.
Step 7: Watch Your Word Targets
The bottom bar of the Writing Studio shows "X / Y words": the words you've written out of the section's word target. When a target is set, you also see a progress bar and a percentage. The target comes from the Chapter Detail Generator, and you can click the target number to change it.
Where Do I See My Word Count?
Look at the bar along the bottom of the writing area. The word count shows as "X / Y words." Y is the section's word target. A progress bar and a percentage show when a target is set. In the main editor area, the word count also shows with a progress bar.
On a phone, the word count sits right under the autosave status.
Where Does the Word Target Come From?
The target (Y) comes from the Chapter Detail Generator (Step 3 · BUILD).
Can I Change the Word Target?
Yes. Click the target number to change it.
What If There's No Word Target?
With no target, the bar counts up from zero. If the target says 0, you haven't run the Chapter Detail Generator for this section yet. Run the Chapter Detail Generator in the toolkit first, then come back, and the target fills in by itself. Still 0? See Why Does My Word Target Say 0?.
Does the Word Count Show on a Phone?
Yes. On a phone, the autosave status and the word count sit together on the left of the bottom bar. See Using the Writing Studio on a Phone or Tablet.
What Else Is in the Bottom Bar?
- Autosave status: "Auto-saved," then "Saving…," then "✓ All changes saved." See Autosave and Save to Your Cloud.
- Save to Your Cloud: A backup copy of your whole book in your own storage.
- Dictate: Voice input. Click once to start, and click again ("Stop recording") to stop.
Step 8: Trust Autosave
Everything you type saves automatically about half a second after you stop typing. You never need to click Save. Save to Your Cloud is a separate button that puts an extra backup copy in your own storage.
How Does Autosave Work?
Your typing saves into the app's own database, tied to your account. Nothing is kept only in your browser. You never need to click Save, and your book is there when you come back on any device.
The bar along the bottom of the writing area shows the status:
- Auto-saved
- Saving…
- ✓ All changes saved
This happens whether or not you've connected Google Drive, Dropbox, OneDrive or a folder on your computer.
What Does Save to Your Cloud Do?
It makes a backup copy of your whole book in your own storage: the Google Drive, Dropbox, OneDrive or computer folder you connected. It's not our database. Your typing is already saved to our database automatically. On a phone, it shows as a cloud icon.
Connecting your own storage adds an extra backup copy. It's made in the background, and again whenever you press Save to Your Cloud. It doesn't replace the automatic save. The automatic save to our database always happens first, so typing stays instant.
Why Does the App Ask Me to Connect Storage?
The first time you click + Create New Book or + Import External Book, a "Choose your storage platform" screen appears with Google Drive, Dropbox, OneDrive and Save to This Computer. When you connect your own storage, a real backup copy of your book lives somewhere that's truly yours, not just inside the app. You connect once, and the app remembers it for every future new or imported book.
If you pick Google Drive, you're also asked to choose or create a folder in your own Drive right after connecting. You can change it later in Account Settings → Connected Services → Change folder. That only redirects future backups. Anything already saved stays where it is. Dropbox and OneDrive create their app folder automatically.
If you close the "Choose your storage platform" window instead of connecting, no book is created and nothing is saved for that try. Click + Create New Book or Import again and connect a provider. A book you already have open keeps autosaving no matter what.
See How to Connect Cloud Storage.
What If I See "Not saved — retry"?
If a save to our database fails, the bar says "Not saved — retry." Do this:
- Keep the page open.
- Copy any unsaved text somewhere safe.
- Use the retry.
See also My Changes Did Not Save.
What If It Says the Book Changed in Another Session?
That happens when the same book is open on two devices. Keep the page open, copy any unsaved text, and reload before you edit.
Do I Need to Save Before I Export?
PDF and ePub downloads and word counts read your latest saved manuscript sections. If a save fails, fix the save error before you export, so your download is current.
Can I Keep a Copy on My Own Computer or in iCloud?
Yes. Pick Save to This Computer on the storage screen. In Chrome or Edge, you pick or create a folder once, and every future save writes there automatically. To get your book into iCloud, point Save to This Computer at a folder inside your Mac's iCloud Drive, and iCloud's own sync takes it from there. There's no separate iCloud button.
In Safari, Firefox and Brave, Save to This Computer still works, but it asks you to choose a save location every time instead of remembering one.
The Export button at the top right of the Writing Studio is always there too. It downloads a real PDF or ePub copy straight to your computer.
Is There a Version History I Can Open?
Every save is automatically kept as a permanent snapshot in the background, so a mistake or an accidental change is never lost for good. There's no button in the app yet to browse and restore an old version yourself. Need an earlier version? Email contact@goldenbestseller.com with roughly when the content was right, and we can find it in that saved history and put it back for you. See Is My Book Safe?.
What Comes Next?
Start writing: How to Write Your First Section. Not sure where to start? The Course Coach inside the app guides you through every step, so you're never stuck on a button.
Related Tutorials
Last checked in the app: October 15, 2026.
Still Need Help?
Inside the app, the Course Coach answers your questions and guides you step by step. You can also write to us and we will get back to you.
Contact Support