How to Format Your Text in the Writing Studio: Every Toolbar Button, Step by Step
Make text bold, italic or underlined, align it, make lists, indent, pick a font, size, line height and color, and add links, QR codes, pictures and emoji.
Everything you format in the Writing Studio happens in the toolbar above your text. This tutorial walks through every button, one at a time, with a real screenshot of each.

How Do I Format My Text Step by Step?
Write in the Visual Editor. The toolbar sits above your text, in two rows. Select your words, click a button, and you're done. Hover over a button to see its name, and its keyboard shortcut if it has one.
Step 1: Bold, Italic and Underline
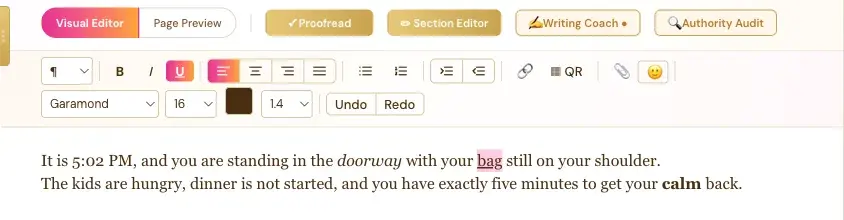
Select the words you want to change, then click B for bold, I for italic or U for underline. Your changes show right away in the editor.
#### How Do I Make Text Bold in the Writing Studio?
- Select the word or words you want.
- Click B in the toolbar, or press Ctrl+B.
Click it again to take the bold off.
#### How Do I Make Text Italic?
Select your words and click I, or press Ctrl+I. Italic is great for a thought, a title or a word you want to lean on.
#### How Do I Underline Text?
Select your words and click U, or press Ctrl+U. The button lights up pink while your selection is underlined, so you always know it's on.
Step 2: Alignment
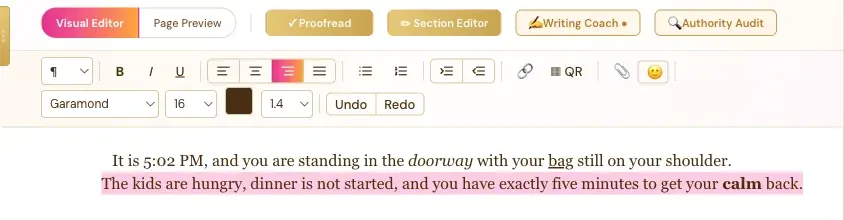
Click in a paragraph, then click one of the four alignment buttons in the toolbar: Align Left, Align Center, Align Right or Justify (Block).
#### How Do I Align a Paragraph?
- Click anywhere in the paragraph, or select several paragraphs.
- Click Align Left, Align Center, Align Right or Justify (Block).
The button for the alignment you're using lights up pink.
#### What Is Justify (Block)?
Justify spreads each line of a paragraph so both edges are straight, like a block of text in a printed book.
#### Can I Align a Picture or a QR Code?
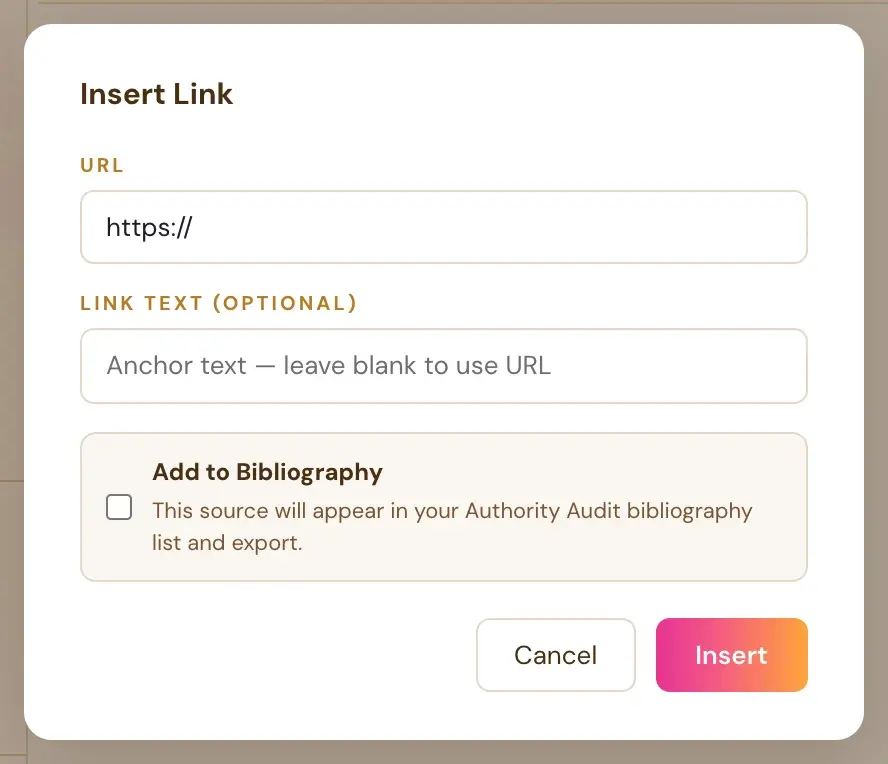
Yes. Click the picture or the QR code, then click Left, Center or Right. The same buttons work for both. See How to Resize and Align a Picture.
#### Which Alignment Should I Use for My Book?
Left alignment is the easy choice for most of your text, and it's what new text starts with. Center is lovely for a short line, like a dedication. You can check how it prints in Page Preview.
Step 3: Bullet and Numbered Lists
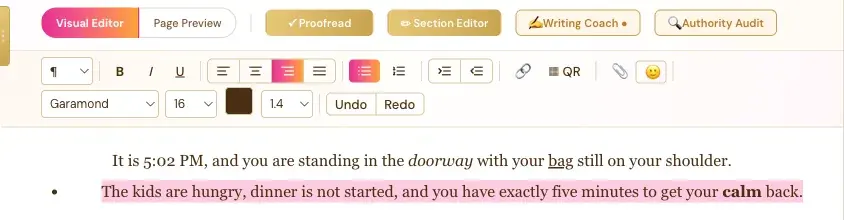
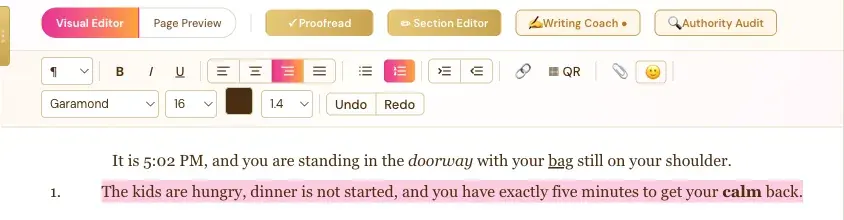
Click in the line you want, then click Bullet List or Numbered List in the toolbar. Click the same button again and the list goes away.
#### How Do I Make a Bulleted List?
- Click in the line, or select the lines you want in your list.
- Click Bullet List.
Each line gets its own bullet.
#### How Do I Make a Numbered List?
Select your lines and click Numbered List. The numbers fill in for you.
#### How Do I Turn a List Back Into Normal Text?
Click the lit-up list button again.
#### Do Lists Carry Into My PDF and ePub?
Yes. Bold, italic, links and lists are real structure, so they stay when you paste text in. See What Happens When You Paste Text.
Step 4: Indent and Outdent
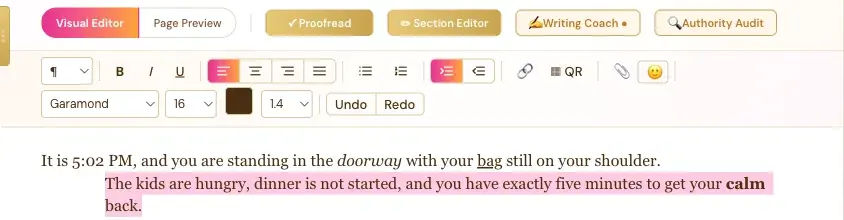
Click in a paragraph, then click Indent to move it to the right, or Outdent to bring it back to the left.
#### How Do I Indent a Paragraph?
- Click in the paragraph.
- Click Indent.
Click it again to move the paragraph a step further.
#### How Do I Outdent a Paragraph?
Click Outdent to move it back, one step at a time.
#### Is Indent the Same as a Quote?
No. Indent and Outdent just shift a paragraph. A real quote is the ❝ choice in the paragraph style menu. See How to Add a Blockquote in the Writing Studio.
#### Can I Get Indented First Lines Throughout My Book?
Yes, and you don't need to indent every paragraph yourself. In Page Preview, the Paragraphs dropdown has Block (spaced) and Indent (traditional) for your whole printed book. See Format, Template and Paragraph Style.
Step 5: Paragraph Style and Blockquote
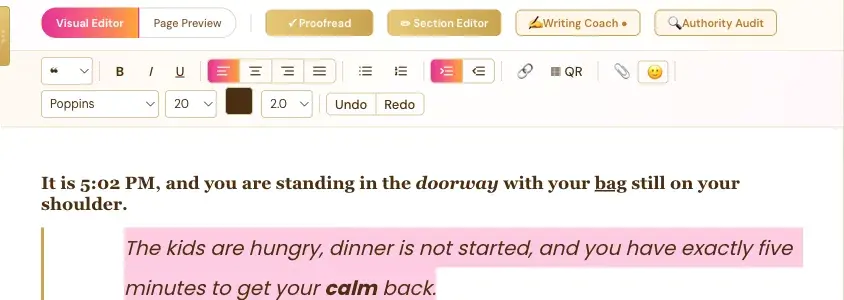
Click in a paragraph, open the Paragraph style menu, and choose ❝. The paragraph turns into a real styled quote, with a gold bar down the side.
#### How Do I Make a Blockquote?
- Click in the paragraph you want as a quote.
- Open the Paragraph style dropdown, the first one on the toolbar.
- Choose ❝.
#### What Else Is in the Paragraph Style Menu?
The menu has four choices: ¶ for normal text, H3, H4 and ❝ for a blockquote. See Heading Levels in the Writing Studio for H3 and H4.
#### Is a Blockquote the Same as Indent?
No. A blockquote is a real quote style. Indent and Outdent only shift a paragraph. See How to Indent and Outdent a Paragraph.
#### How Do I Turn a Blockquote Back Into Normal Text?
Choose ¶ in the Paragraph style menu.
Step 6: Font, Size and Line Height
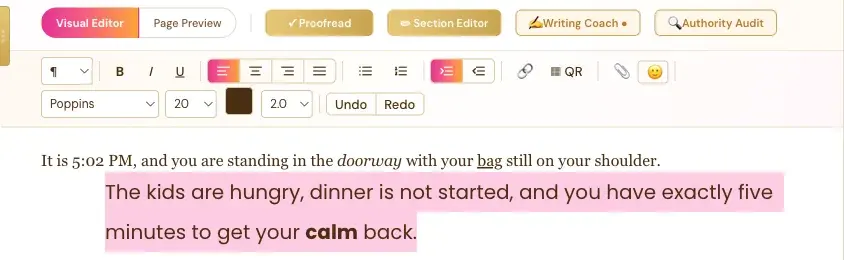
Select your text, then pick a font, a size and a line height from the three dropdowns in the second toolbar row. They change only the text you selected, just like in any word processor.
#### Which Fonts Can I Choose?
The Font dropdown has seven fonts:
- Garamond
- Georgia
- Times New Roman
- Poppins
- DM Sans
- Helvetica
- Courier New
#### Which Font Sizes Can I Choose?
The Font size dropdown goes from 10 all the way up to 96: 10, 11, 12, 13, 14, 16, 18, 20, 24, 28, 32, 40, 48, 64, 80 and 96. The large sizes are great for making an emoji or a symbol bigger.
#### Which Line Heights Can I Choose?
The Line height dropdown has 1.0, 1.15, 1.4, 1.5 and 2.0. A bigger number means more space between lines.
#### How Do I Change the Font, Size or Line Height?
- Select the text you want to change.
- Open the dropdown and pick your choice.
#### Will My Choices Show in the Printed Book?
Page Preview and your exported PDF use the real print layout, so check your pages there. See Page Preview and Full Screen.
Step 7: Text Color
Select your text and click the color swatch in the toolbar. A color picker opens, and your text changes color as you pick.
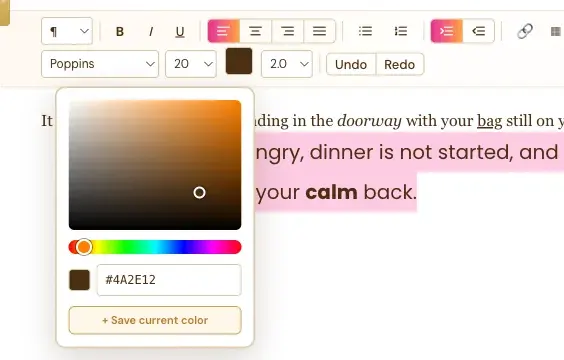
#### How Do I Change Text Color?
- Select the words you want.
- Click the Text color swatch in the second toolbar row.
- Click a spot in the gradient square, or drag the hue slider to change the color family.
- Or type a color into the hex code box. The one in the picture is #4A2E12, a warm brown.
#### Can I Save My Favorite Colors?
Yes. Click + Save current color, and your color is saved as a favorite for next time.
#### How Do I Close the Color Picker?
Click the color swatch again.
Step 8: Undo and Redo
Made a change you don't like? Click Undo to take it back. Click Redo to bring it back again.
#### Where Are the Undo and Redo Buttons?
They sit at the far right of the second toolbar row, right after the line height dropdown.
#### Are Undo and Redo on My Phone?
Not on phones, to save room. They're on desktop and tablets. See Using the Writing Studio on a Phone or Tablet.
#### Is My Writing Saved Automatically Too?
Yes. Everything you type saves by itself. See Autosave and Save to Your Cloud.
Step 9: Add a Link, a QR Code, a Picture or an Emoji
The same toolbar has four more buttons. Each one opens its own small window.
- 🔗 Link: adds a web address to your text. See How to Add a Link in the Writing Studio.
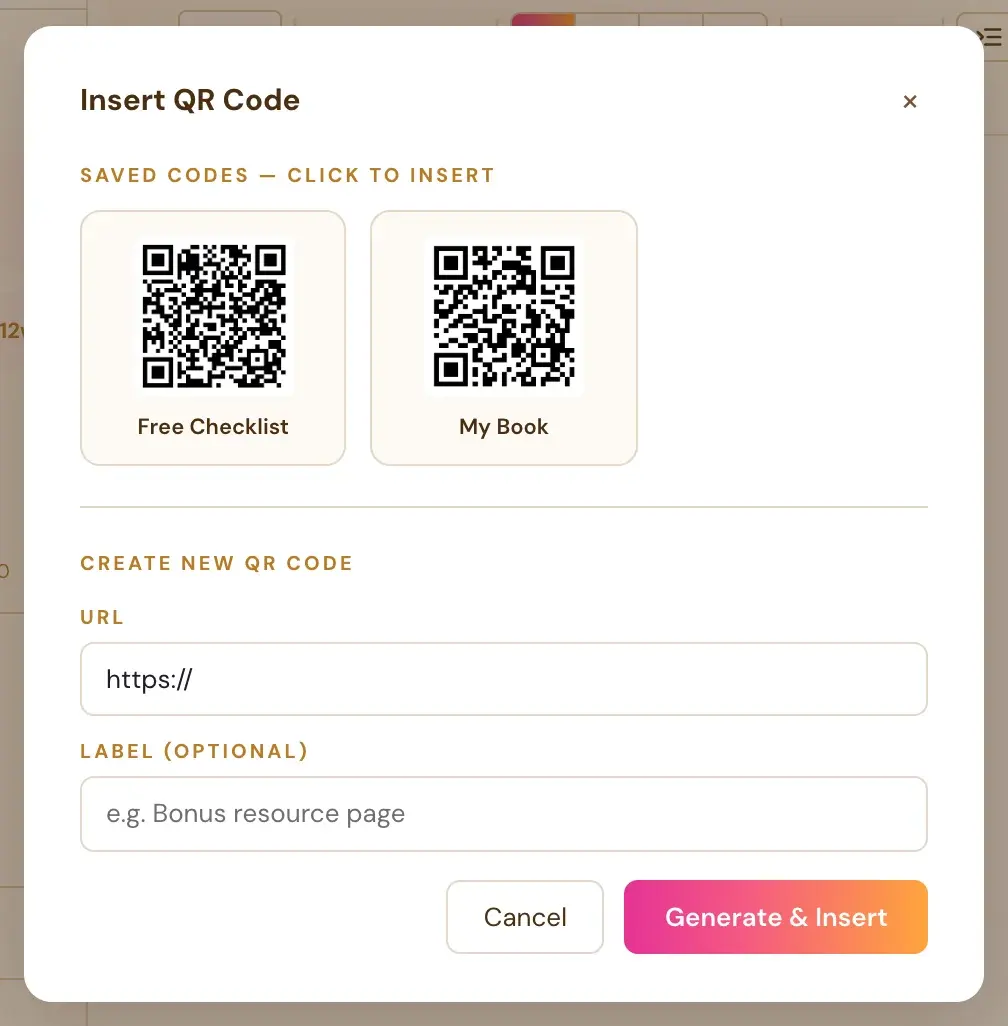
- ▦ QR: adds a QR code from your QR Library. See How to Add a QR Code to Your Book.
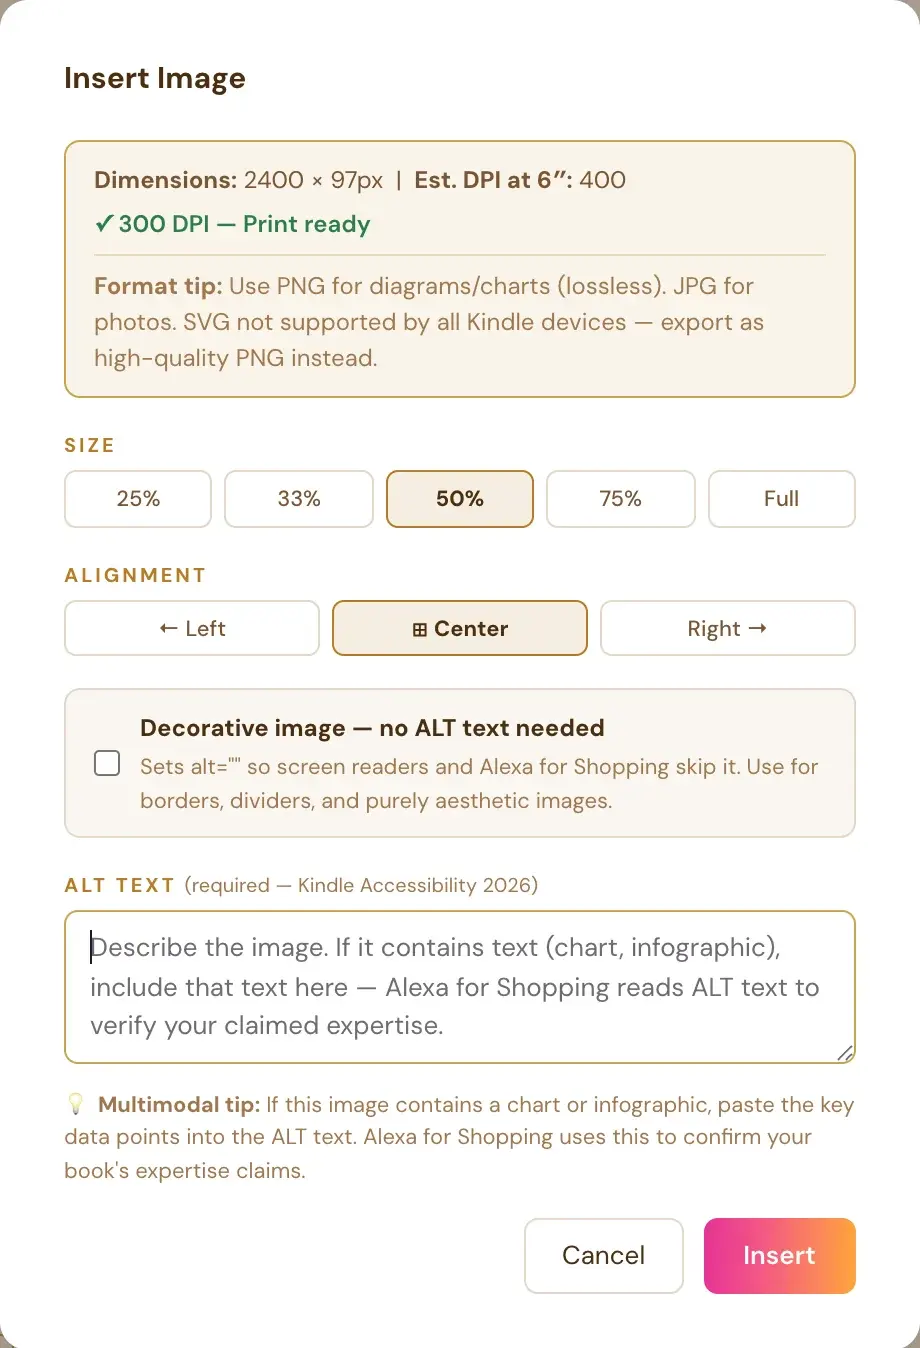
- 📎 Upload image file: adds a picture, and asks for its ALT text. See How to Add Images and ALT Text.
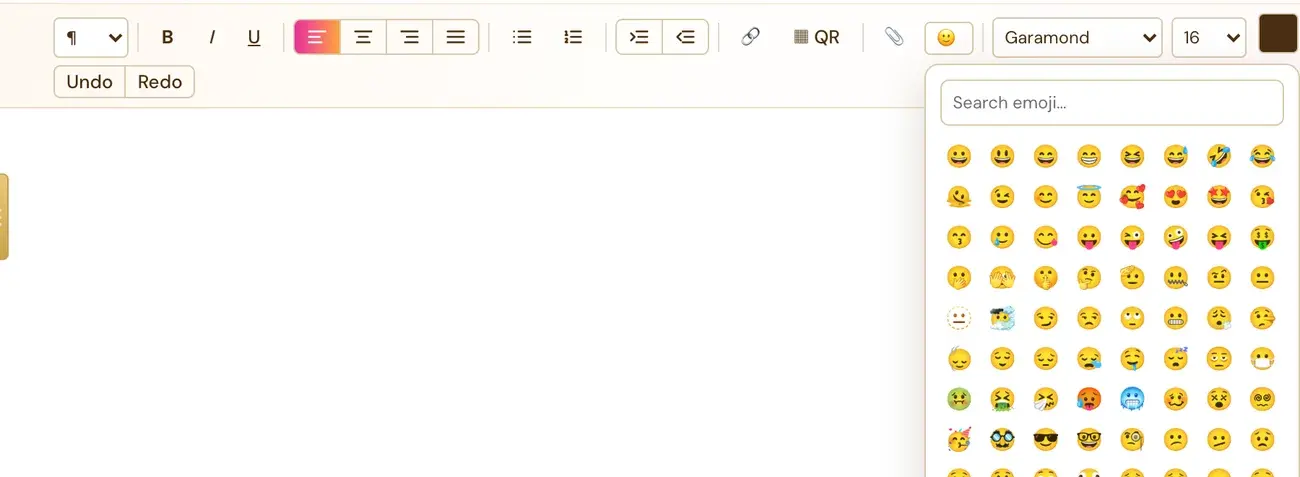
- 🙂 Insert emoji: opens a searchable emoji picker. See How to Add Emoji to Your Book.
What If Something Goes Wrong?
- My text didn't change. Select the words first. Font, size, color and line height change only the text you selected.
- I can't find Undo and Redo on my phone. They're only on desktop and tablets, to save room.
- I can't type after running Proofread. Click Done in the Proofread banner.
What Comes Next?
See how your formatting looks in print with How to Use Page Preview and Templates. Not sure where to start? The Course Coach inside the app guides you through every step, so you're never stuck on a button. Back to the Writing Studio Tour.
Related Tutorials
Last checked in the app: October 14, 2026.
Still Need Help?
Inside the app, the Course Coach answers your questions and guides you step by step. You can also write to us and we will get back to you.
Contact Support